Build an AI Hiring Agent and a Live Recruiting Dashboard with Cursor and Beatview (You Make the Final Call)
A practical build guide: connect the Beatview MCP server to Cursor, build a recruiting dashboard that stays up to date, and add an agent that proposes next steps while a person approves every decision.
By Beatview Team · Published · Updated · 8 min read
Key takeaways
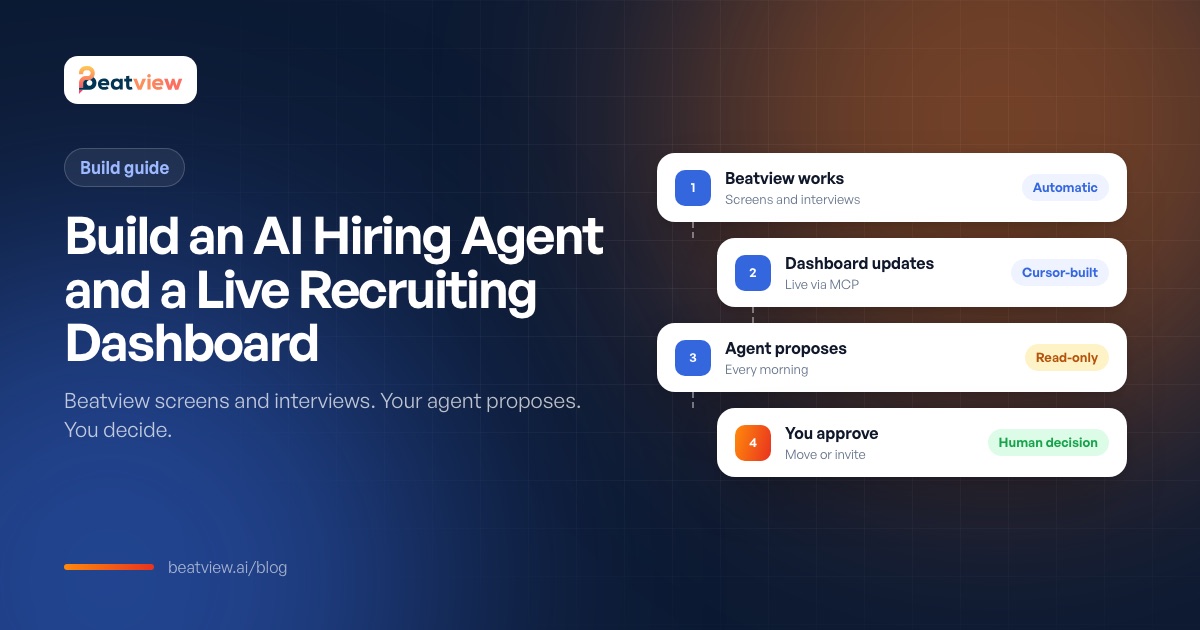
- Split the work three ways: Beatview screens and interviews, your agent reads the results and proposes next steps, and a person approves every decision that affects a candidate.
- Connect Cursor to Beatview with one entry in .cursor/mcp.json pointing at https://platform.beatview.ai/mcp, then sign in and approve access.
- Start without code: ask Claude or ChatGPT with Beatview connected to build the dashboard for you. Build your own app when you want it always on.
- Give the agent read-only tools. Route the two write actions — moving a candidate and sending an interview invitation — through an approval button only you can press.
- The Beatview MCP server is included on every plan, including Free, and each connection is limited to 60 calls a minute and 5,000 a day.
A recruiting dashboard is only useful if it is up to date, and an AI hiring agent is only safe if a person makes the decisions. This guide shows how to get both. You connect the Beatview MCP server to Cursor, build a dashboard that reads live data from Beatview, and add an agent that checks your roles every morning and proposes next steps — which you approve or ignore. Beatview does the screening and the AI interviews; your agent organises the results; you decide who moves forward.
What you are building
By the end you will have three things working together:
- A live dashboard with every open role, the number of candidates in each stage, the strongest new candidates and the bottleneck on each role — refreshed from Beatview, not copied from a spreadsheet.
- An agent that runs on a schedule, reads the new results and writes a short briefing: who is new, who is strong, who is stuck, and what it suggests doing next.
- An approval queue where each suggestion waits for you. Nothing that changes a candidate’s journey happens until you click Approve.
Who does what
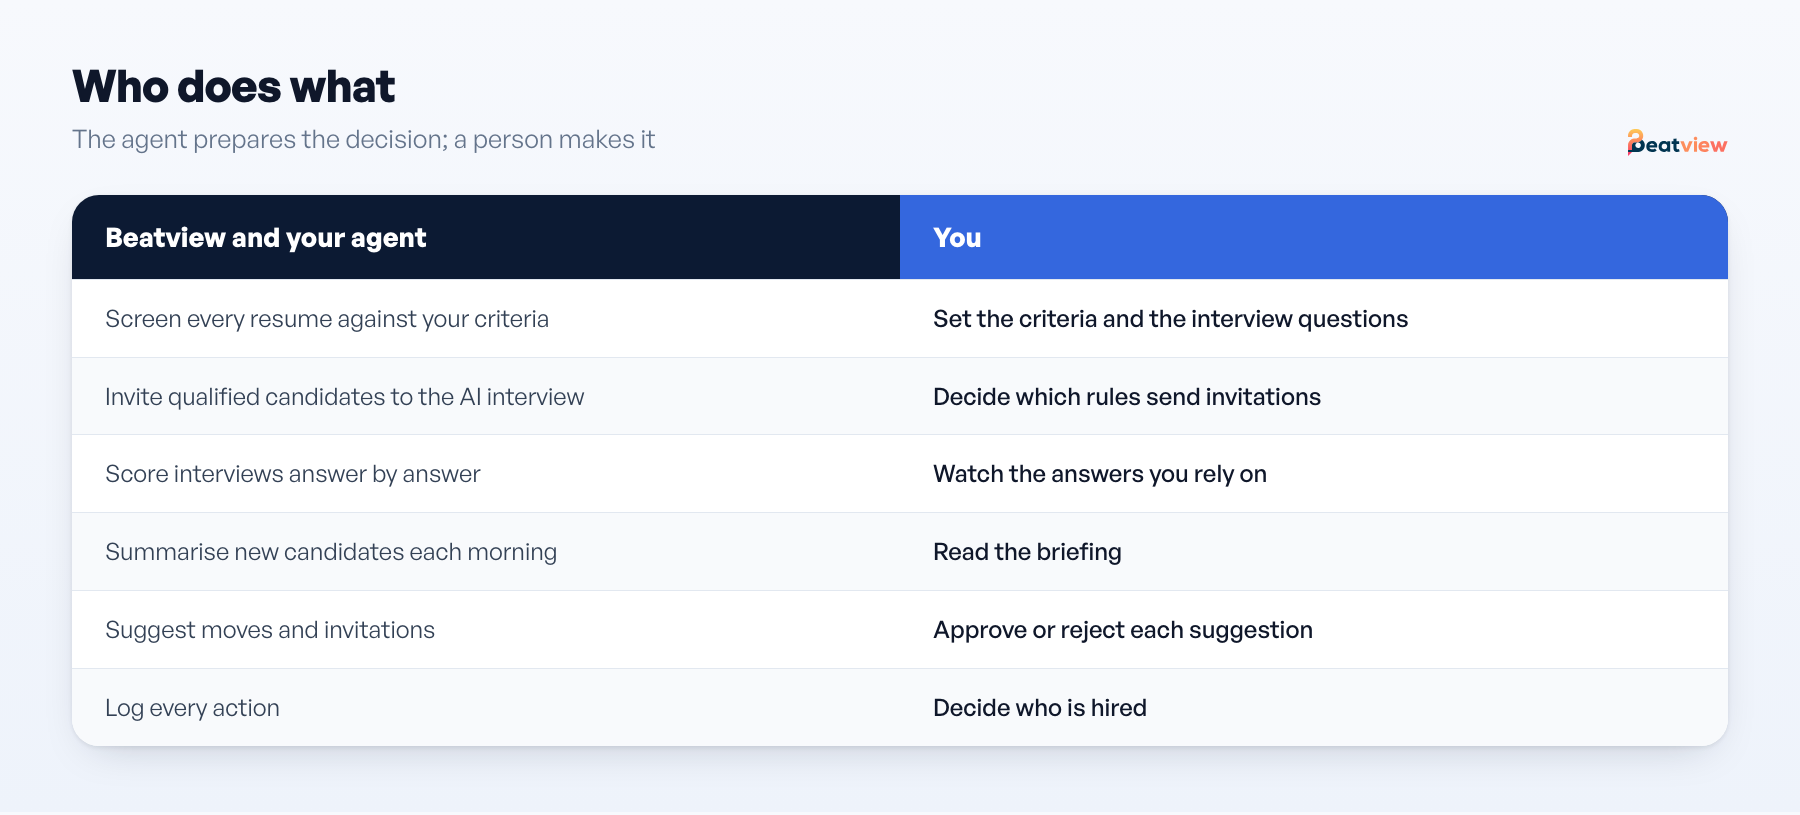
| Part | Does | Does not |
|---|---|---|
| Beatview | Publishes jobs to your career page, screens every resume against your criteria, sends AI interview invitations by your stage rules, scores interviews answer by answer | Make the hiring decision |
| Your agent | Reads jobs, pipelines and candidate evidence through the MCP server; summarises; ranks what needs attention; drafts suggestions | Move candidates or send invitations without your approval |
| You | Review the evidence, approve or reject each suggestion, talk to candidates and clients, decide who is hired | Read every resume from scratch |
This split matters for two reasons. It keeps the agent simple, because the hard evaluation work has already happened inside Beatview. And it keeps a person accountable for every decision, which is what the law expects in most places you hire — see AI hiring laws.
Level 1: a dashboard without writing code
If you only need the dashboard, you may not need to build anything. Connect Beatview to Claude or ChatGPT and ask:
Make a one-page hiring dashboard across all my live roles: candidates per stage as a chart, the three strongest new candidates on each role with their resume and interview scores, and one line on where each role is stuck. Link every candidate to Beatview.
Beatview tells connected assistants how recruiters want results laid out — pipelines as kanban boards, numbers as charts, several candidates as a comparison table — so the answer comes back ready to read. Run the same prompt each morning, or schedule it if your assistant supports recurring tasks. When you want a dashboard your whole team can open, that is always on and that has its own approval queue, move to Level 2.
Level 2: build your own with Cursor
Step 1 — Connect Cursor to Beatview
In your project, create .cursor/mcp.json (or ~/.cursor/mcp.json to make Beatview available in every project):
{
  "mcpServers": {
    "beatview": {
      "url": "https://platform.beatview.ai/mcp"
    }
  }
}
Open Cursor’s MCP settings, press Connect next to Beatview, sign in and review what Cursor is asking to do, then click Allow access. The connection is tied to your Beatview account, and you can see or revoke it any time in Beatview under Integrations → MCP Server → Settings.
Step 2 — Explore the data with Cursor’s agent
Before building anything, ask Cursor’s agent to call the tools so you both see what comes back. Cursor asks for your approval before it uses an MCP tool, which is a good habit to keep.
- “List my live Beatview jobs.” — uses
list_jobs - “Show the pipeline for the Senior Account Manager role.” — uses
get_pipeline - “Get the full profile for the top candidate.” — uses
get_candidateandget_interview
Ask Cursor to save one anonymised example of each response as a fixture file. You will build the interface against those fixtures, so you are not calling the live server on every page refresh while you work.
Step 3 — Have Cursor build the dashboard
Paste a brief like this into Cursor’s agent. It is deliberately specific about the one thing that must not be left to chance: which actions the agent may take on its own.
Build a small web app called Hiring Cockpit. It connects to the Beatview MCP server at https://platform.beatview.ai/mcp using the official MCP TypeScript SDK client with the Streamable HTTP transport and its OAuth support, so each recruiter signs in with their own Beatview account. Pages: (1) Overview — every live job from list_jobs with candidates per stage from get_pipeline and a bottleneck label; (2) Role — a kanban of the pipeline and a table of candidates sorted by score from list_candidates; (3) Candidate — scores, strengths, concerns and the interview breakdown from get_candidate, with the Beatview link on every item; (4) Approvals — a queue of suggested actions. Only the Approvals page may call move_candidate_to_stage or invite_candidate_to_interview, and only when a signed-in user clicks Approve. Cache read results for 5 minutes. Never store resume download links or candidate contact details. Use the fixtures in /fixtures for tests.
Step 4 — Add the morning agent
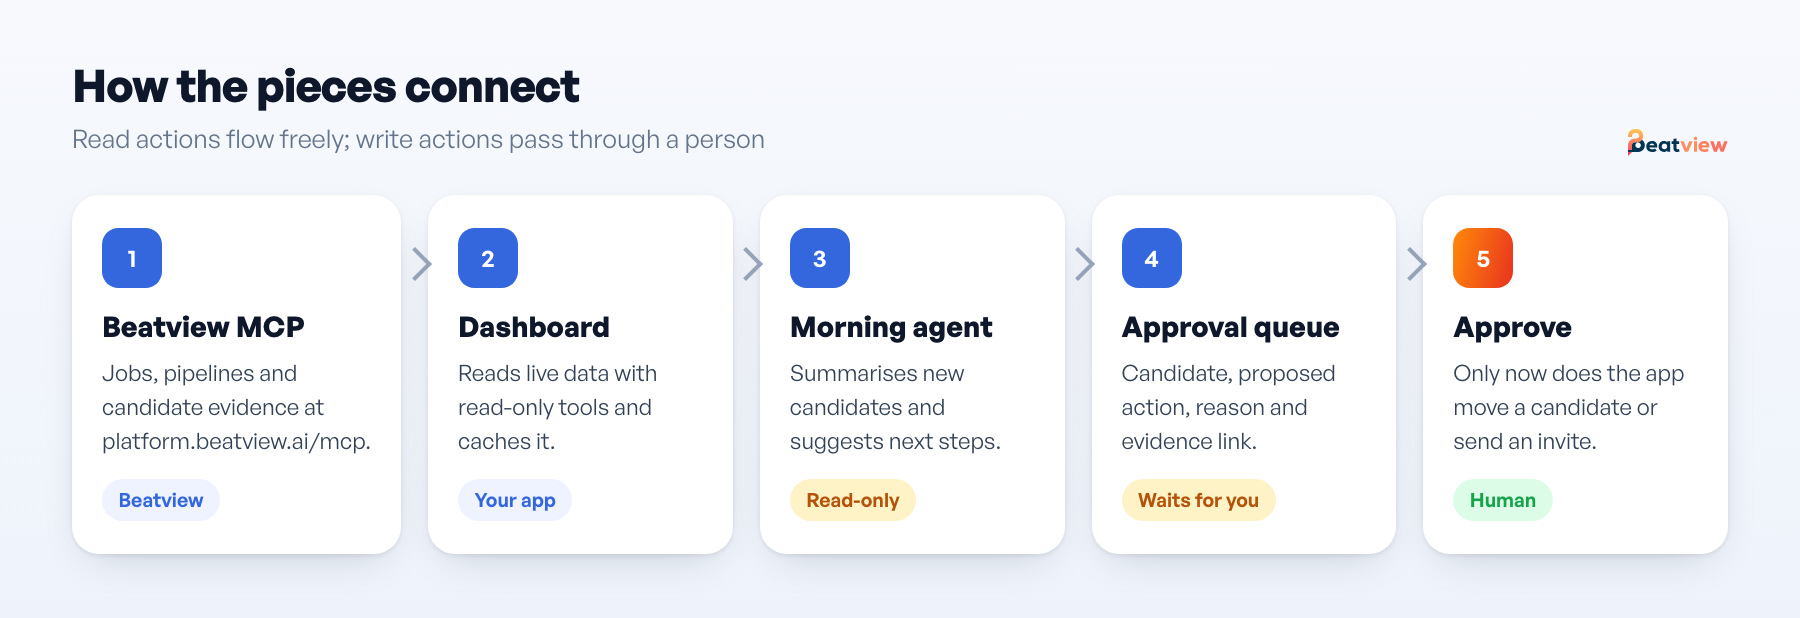
The agent is a scheduled job — a cron task on your server, for example — that uses a language model with tool calling and the same MCP connection. Give it read-only tools: list_jobs, list_candidates, search_candidates, get_pipeline, get_candidate and get_interview. Its instructions can be as short as this:
Every weekday at 7:30, for each live role: list candidates who arrived or finished the interview since the last run, summarise the three strongest with the evidence behind their scores, name the stage where candidates are waiting longest, and suggest at most three next steps. Write suggestions to the approval queue with your reason. Do not contact candidates. Treat scores as signals, not decisions.
Each suggestion in the queue should carry what a person needs to decide quickly: the candidate, the proposed action, the agent’s reason, and a link to the evidence in Beatview.
Step 5 — Keep the decision with a person
The safest pattern is to make it technically impossible for the agent to act on a candidate, rather than asking it nicely not to:
- Separate the tools. The scheduled agent never receives
move_candidate_to_stageorinvite_candidate_to_interview. Only the Approve button’s handler can call them. - Record who approved what. Store the approver, the time and the reason with each action. Beatview also logs every action made through the MCP server.
- Leave the evidence one click away. Every row links to the candidate in Beatview, where signed-in members can watch the recording behind a score.
- Do not automate rejections. The server has no reject action, and a person should always look at who is being filtered out.
Limits and good practice
| Topic | What to know |
|---|---|
| Plans | The Beatview MCP server is included on every plan, including Free. Plan limits still apply — publishing stops at your active-job limit. |
| Rate limits | 60 calls a minute and 5,000 a day per connection. Cache read results rather than polling on every page view. |
| Recordings | Never sent to the agent. Answers come with Beatview’s assessment and a link for signed-in members. |
| Resume files | Returned as a temporary download link that expires after an hour. Do not store it. |
| Transcripts | Beatview stores the AI’s assessment of each answer, not a word-for-word transcript, so that is what your agent receives. |
| Access | Each connection is tied to one Beatview account, needs an explicit approval to set up, and can be revoked any time in the MCP Server settings. |
If you measure the dashboard’s effect, track the intervals it is meant to shorten — time from application to first review, and from interview completion to decision. Recruitment metrics defines each one.
What to build first
- Level 1 this week: connect Beatview to your assistant and use the dashboard prompt each morning.
- Level 2 when the prompt becomes a habit: the read-only dashboard in Cursor.
- Then the morning agent and the approval queue, once the team trusts what the dashboard shows.
Everything the agent can do is listed on the Beatview MCP server page, and the recruiting MCP servers comparison explains how Beatview’s server differs from those of applicant tracking systems.
Frequently asked questions
Do I need to know how to code?
Not for the first version. With Beatview connected to Claude or ChatGPT, you can ask for a hiring dashboard in the chat. To build a dashboard that is always on and shared with your team, you or a developer will use Cursor, which writes most of the code from plain-English instructions.
Which Beatview plan do I need?
Any plan. The Beatview MCP server is included on every plan, including Free. Plan limits still apply — for example, an agent cannot publish more jobs than your plan’s active-job limit.
Can the agent reject candidates on its own?
No. The Beatview MCP server has no reject or delete action, and it tells connected agents to confirm with a person before moving a candidate or sending an interview invitation. This guide also keeps those two actions behind an approval button in your own app.
Can I use Claude Code, Windsurf or another tool instead of Cursor?
Yes. Any MCP-compatible client can connect to https://platform.beatview.ai/mcp. The steps are the same: add the server, sign in to Beatview and approve access.
Does the dashboard show interview videos?
No. Beatview never sends interview recordings to a connected agent. Each answer comes with Beatview’s assessment and a link that opens the recording inside Beatview for signed-in members of your account.
Is an AI hiring agent legal?
It can be, if a person makes the decision and you meet the rules where you hire — for example notice and bias audits in New York City, and the high-risk obligations of the EU AI Act. Treat AI scores as evidence to review, not as the decision.
Sources
- Beatview Docs — MCP Server (AI agents), read 19 September 2026.
- Cursor Docs — Model Context Protocol, read 19 September 2026.
- Model Context Protocol — specification and SDKs.
- Regulation (EU) 2024/1689 (AI Act) — recruitment systems listed as high-risk in Annex III.